A neighborhood for your desk
Print a compact city tile of a meaningful place and turn its street pattern and skyline into a personal display.
 Contour FoundryMAPS FOR MAKING
3D PRINTING / 3D city maps
Bring a neighborhood to your desk, build a keepsake of a favorite city, or explore a skyline from a different angle. Generate a 3D model from mapped buildings, with an optional connected base and raised streets, plus companion vector artwork.
STL and OBJ models, with SVG artwork and building-height layers in the same ZIP.
5 credits per finished generation · Free previews · Digital download
START WITH SOMETHING PERSONAL
Print a compact city tile of a meaningful place and turn its street pattern and skyline into a personal display.
Compare neighborhoods, explore how buildings relate to streets, or use the model as a starting point for a creative visualization.
Use the companion building-height SVGs to plan a layered model, with separate footprints and geographic features for your making workflow.
INSIDE YOUR DOWNLOAD
A ZIP brings your finished files together. Extract it on your device to use the contents in your software.
City mode includes both model formats. Use STL in a compatible 3D-printing slicer, or OBJ in software that accepts it for further model work.
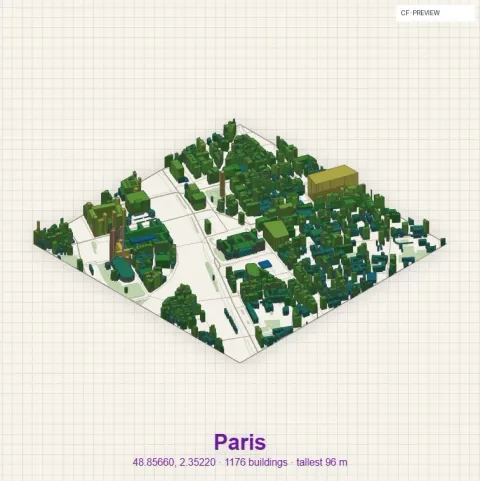
Receive the angled city illustration shown by the generator as vector artwork, alongside the model files.
The layers folder includes building footprints and height bands, with available roads, water, parks and enabled extras. Design settings and source notes stay with the package.
This breakdown applies to 3D city mode. The same studio also offers terrain modes, which produce their corresponding terrain files instead of city STL and OBJ models.
| File or layer | What it represents | How you can use it |
|---|---|---|
| STL model | Building geometry with your chosen base and road settings. | Import into a slicer, choose your printer profile and prepare a print. |
| OBJ model | The city geometry in an alternative 3D format. | Open in compatible modeling software for a scene or further editing. |
| Isometric SVG | An angled vector illustration of the city. | Use as companion artwork or as a reference for the model. |
| Footprints & height bands | Plan-view outlines and groups of buildings at successive heights. | Prepare a layered craft model or study the building layout. |
| Roads, water & parks | Separate companion artwork for available, enabled features. | Plan engraving, contrasting materials or extra visual detail. |
MAKE IT YOURS
Start with the defaults, then adjust the details that matter to you. Help icons explain the settings, and free previews let you review the result before generating finished files.
PUT YOUR FILES TO WORK
Choose 3D city mode and focus on the neighborhood you want. A smaller area preserves more visible building detail at a given finished width. The city-mode radius limit is about 1.86 miles (3 km).
Choose a base, set the width and adjust building-height emphasis. Add raised roads if you want them in the model. Generate a free preview to review the composition.
Generate the files, extract the ZIP and import the STL into a compatible slicer such as PrusaSlicer. Confirm the model dimensions; the geometry is authored in millimeters.
Select your printer and material profile, orient the model, and inspect the sliced layers for thin buildings or disconnected parts. Make any repairs or support adjustments your slicer requires before printing.
BEFORE YOU CREATE
The model uses mapped footprints and available heights. Where heights are missing, it uses floor counts or your chosen estimates. It is a stylized city model, not a detailed architectural or survey model.
Raised roads are an optional model feature. Water and parks are included in companion artwork when enabled and available; their illustration colors are not a textured model or automatic multicolor print.
Review the model in your slicer. Building size, thin details and connected parts vary with the area and scale. A connected base helps support the model, but printer-specific preparation remains part of your workflow.
The companion SVGs include footprints and building-height bands for that approach. Plan sheet thickness, backing and support for individual pieces, then assign operations in your cutting software.
Explore your settings and generate a free preview. Choose Generate files and confirm the displayed credit cost when you want the finished package. Once generation completes, use Download ZIP. A failed generation returns its reserved credits. Downloading the same completed package again is free while it is available; generating another package uses credits.
START WITH YOUR PLACE
Create an account, verify your email and explore your design. Purchase credits when you are ready to generate finished files.
Create your first map5 credits per finished generation. Software, machines, materials, printing and physical delivery are not included.