A layered hometown map
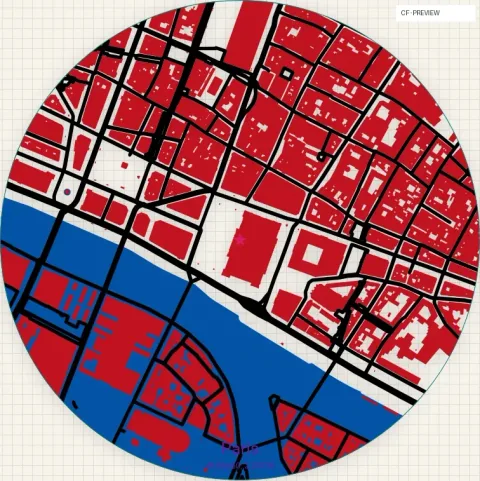
Combine a wood street layer with a contrasting background. Use the water and park shapes to plan colored inserts or extra sheets.
 Contour FoundryMAPS FOR MAKING
LASER & CUTTING / Street maps
Turn the streets around a first home, a favorite city or a wedding venue into a piece you can cut, engrave and assemble. Get editable vector artwork with the map features separated, so you can decide how every part of your project is made.
Layered SVG files for laser projects, personalized gifts and wall art.
1 credit per finished generation · Free previews · Digital download
START WITH SOMETHING PERSONAL
Combine a wood street layer with a contrasting background. Use the water and park shapes to plan colored inserts or extra sheets.
Score the road network and engrave buildings or lettering onto a plaque. Mark the place where a memorable day happened.
Create a larger city composition, simplify small details, and choose a finish that complements your space.
INSIDE YOUR DOWNLOAD
A ZIP brings your finished files together. Extract it on your device to use the contents in your software.
Open the combined artwork to see all included features together. SVG stores editable paths and shapes, so you can work with the actual geometry instead of tracing a screenshot.
The layers folder contains numbered files for the features in your generated map. Import only the parts you need, assign different operations, or prepare different sheets of material.
The ZIP also includes START-HERE.txt, design-settings.json and map-data attribution. The settings record helps you identify the location and choices behind the artwork.
These are feature layers, giving you control over the artwork. Which files appear depends on your selected settings and the features available at that location. Numbering and names vary with the design.
| Included feature | What it contains | How you might use it |
|---|---|---|
| Streets | Wide road shapes or fine center lines. | Cut the edges of wide shapes, or score the center-line network. |
| Buildings | Filled footprints or building outlines. | Engrave solid building areas or use outlines for a cutting layout. |
| Water & parks | Separate shapes for water and green space. | Plan contrasting colors, engraved areas or material inserts. |
| Paths, railways & coastline | Additional geographic detail when enabled and available. | Add a trail, railway or coastal edge that makes the place recognizable. |
| Marker, caption & frame | Separate finishing elements when included. | Give lettering its own engraving operation and prepare the outer border. |
MAKE IT YOURS
Start with the defaults, then adjust the details that matter to you. Help icons explain the settings, and free previews let you review the result before generating finished files.
PUT YOUR FILES TO WORK
Extract the ZIP, then use File → Import in LightBurn to bring in the combined SVG or your chosen individual layers. Keep all pieces at the same scale and check alignment if you import them separately.
Select the shapes and assign them to the appropriate Cuts / Layers colors. Use Line for cut or score paths and Fill for area engraving. Review the imported colors; the SVG does not contain your machine settings.
Confirm the finished width after import. Check thin roads, detached pieces and lettering. Add bridges, a backing sheet or other construction details where your design needs support.
Set speed, power and passes for your laser and material. Use LightBurn’s preview and a small material test before making the full piece, then assemble or finish it in your chosen style.
BEFORE YOU CREATE
You decide. Layers separate features such as streets and buildings. You can use them for different laser operations on one sheet, or build a physical stack. They are not an automatically engineered assembly kit.
Yes. For example, use street outlines for a cut operation and building shapes for an engraving operation. Assign each operation in your laser software and review the full job before running it.
You receive SVG artwork inside a ZIP, not an LBRN2 project or machine code. Import the SVG, choose your machine settings and save the project in LightBurn.
The map area, street selection, road width and building filters all affect the result. Source coverage varies by location. Use the free preview to check the design, especially tiny details at your intended size.
Explore your settings and generate a free preview. Choose Generate files and confirm the displayed credit cost when you want the finished package. Once generation completes, use Download ZIP. A failed generation returns its reserved credits. Downloading the same completed package again is free while it is available; generating another package uses credits.
START WITH YOUR PLACE
Create an account, verify your email and explore your design. Purchase credits when you are ready to generate finished files.
Create your first map1 credit per finished generation. Software, machines, materials, printing and physical delivery are not included.