A mountain in layered wood
Cut contour sheets from contrasting materials, then stack them to reveal ridges and valleys in a tactile display.
 Contour FoundryMAPS FOR MAKING
LASER & CNC / Terrain relief
Turn a mountain, canyon or island into contours you can hold. Create height layers for a physical relief, clean contour artwork for engraving, or terrain images for a digital or CNC workflow—all from the same chosen place.
Four ways to work with elevation, from stacked SVG layers to PNG heightmaps.
3 credits per finished generation · Free previews · Digital download
START WITH SOMETHING PERSONAL
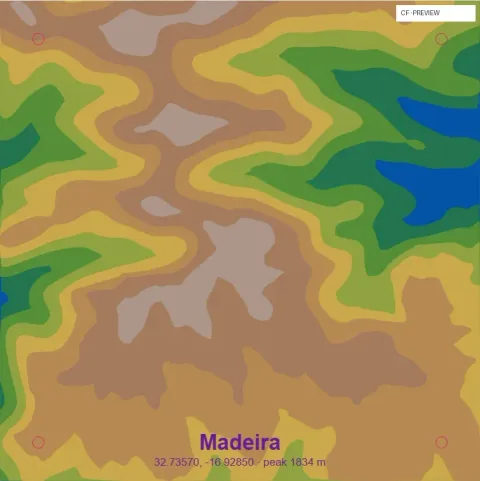
Cut contour sheets from contrasting materials, then stack them to reveal ridges and valleys in a tactile display.
Use contour-line artwork for an intricate plaque or a clean topographic composition.
Take the grayscale heightmap into software that can build a relief from an image, then choose its physical depth and machining approach.
INSIDE YOUR DOWNLOAD
A ZIP brings your finished files together. Extract it on your device to use the contents in your software.
Your ZIP includes the combined SVG and a layers folder. In stacked mode, that folder contains individual height layers named by sequence and elevation.
Stacked exports include the backing piece, registration guide and frame when enabled. Keep these elements with the contour files as you prepare the build.
Heightmap and shaded-relief modes also include a PNG image. Every package includes your design settings, getting-started notes and source attribution.
Each generation uses the mode you select. The outputs below serve different purposes, so choose the mode for the way you want to make or display your landscape.
| Mode | Files you receive | What to do with them |
|---|---|---|
| Stacked contour layers | Combined SVG, individual elevation SVGs and enabled assembly elements. | Prepare sheets for cutting, then assemble them from lower to higher elevations. |
| Contour lines | Combined SVG and contour artwork; enabled lettering. | Import the vectors into cutting or engraving software and assign line operations. |
| Grayscale heightmap | PNG height image plus SVG containing the image. | Import into software that converts grayscale into relief height. Set the physical depth there. |
| Shaded relief | PNG shaded image plus SVG containing the image. | Use as landscape artwork or in a compatible image-engraving workflow. Shading depicts light, not machining depth. |
MAKE IT YOURS
Start with the defaults, then adjust the details that matter to you. Help icons explain the settings, and free previews let you review the result before generating finished files.
PUT YOUR FILES TO WORK
Find a landscape with the ridges, coast or valleys you want. Choose stacked mode and adjust the layer count or contour interval. Use the preview to judge the amount of detail.
Unzip the files and import the height-layer SVGs into LightBurn or compatible vector software. Verify the common finished size. Use the registration guide where needed to keep your sheets aligned.
Choose material thickness and check small islands or detached pieces. Contour intervals describe real-world elevation; your material thickness determines the height of the assembled stack.
Set operations for your machine and material, preview the job and make a test. Keep the numbered layers in order, then assemble from lower to higher elevations on the backing piece.
BEFORE YOU CREATE
Each package contains the output for the mode you selected. You can explore modes with free previews. Generating a finished package for a different mode uses credits for another generation.
The terrain studio supplies SVG and, for its raster modes, PNG. It does not directly export a terrain STL. Use a heightmap-to-relief workflow in suitable modeling or CAM software when that is your intended result.
They provide the contour geometry and optional assembly elements. You choose materials, thickness, alignment and support for detached pieces, and prepare the cutting operations.
Detail depends on the elevation dataset, selected area, output size and smoothing. It represents the ground landscape rather than a survey of individual buildings or trees.
Explore your settings and generate a free preview. Choose Generate files and confirm the displayed credit cost when you want the finished package. Once generation completes, use Download ZIP. A failed generation returns its reserved credits. Downloading the same completed package again is free while it is available; generating another package uses credits.
START WITH YOUR PLACE
Create an account, verify your email and explore your design. Purchase credits when you are ready to generate finished files.
Create your first map3 credits per finished generation. Software, machines, materials, printing and physical delivery are not included.